1> Add few more jars in your WEB-INF/lib folder.
The current view of jars is shown in the figure below.
2> Add a new member named - spring-security.xml in the WEB-INF/config folder. The contents of this file is shown in Listing 1 below:
Listing 1 - spring-security.xml
This is the bare minimum configuration you need to do to get Spring Security started. This is a great relief for those of you who had worked with earlier versions of Spring Security or its ancestor Acegi Security. You had to explicitly configure the entire filter chain. That was tedious and very cumbersome leading to lot of errors and time and effort going down the drain. Thanks Ben and team for this good change. I will explain the different elements in this configuration in future posts as the intention of this post is to quickly get started with Spring Security as promised earlier.
Step 3 - wire everything now in the web.xml. The modified web.xml looks like the one shown below.
There are a few things to note here.
Now that we are all set its time for testing. So launch your favorite browser (mine is Mozilla Firefox) and type the following:
http://localhost:8080/SkyPhotoWeb/index.html
** By the way I am deploying on Tomcat 6 running on JRE 6.
You will be redirected to a login page shown in figure below.
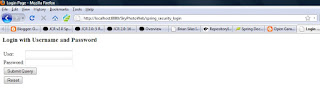
This is a Spring security framework generated login page. Although the desired result is not what we intended (we donot want that the index page is accessed securily rather by all users and guests) but it is clear that Spring Security is up and running, integrated into our Spring MVC application. I will try to correct this in my future post.Also I will show how you how you can add a custom your application specific login page.
Now let us supply the user id and password (jimi/jimispassword) and see what happens. You will be redirected to the index.html page. So it also suggests that Spring Security remembers what you tried prior to signing in.
Thats all for today hopefully. If I find time between watching Indial Premier League and World Field Hockey Finals I will try to clarify a few concepts later in the day.
The current view of jars is shown in the figure below.
 |
| Figure 1 - Adding the Jars |
Listing 1 - spring-security.xml
This is the bare minimum configuration you need to do to get Spring Security started. This is a great relief for those of you who had worked with earlier versions of Spring Security or its ancestor Acegi Security. You had to explicitly configure the entire filter chain. That was tedious and very cumbersome leading to lot of errors and time and effort going down the drain. Thanks Ben and team for this good change. I will explain the different elements in this configuration in future posts as the intention of this post is to quickly get started with Spring Security as promised earlier.
Step 3 - wire everything now in the web.xml. The modified web.xml looks like the one shown below.
There are a few things to note here.
- We have setup DelegatingFilterProxy which will look for a bean springSecurityFilterChain in the spring root web application context.
- The springSecurityFilterChain bean is setup automatically by the
tag. - The DispatcherServlet only has a specific web application context and hence you need to load the root web application context using the ContextLoaderListener. For now this listener only loads the security related beans in the root web application context.
- The ContextLoaderListener must be configured after the log4j listener if the later is used.
- If you do not use the ContextLoaderListener you will encounter the following exception
Now that we are all set its time for testing. So launch your favorite browser (mine is Mozilla Firefox) and type the following:
http://localhost:8080/SkyPhotoWeb/index.html
** By the way I am deploying on Tomcat 6 running on JRE 6.
You will be redirected to a login page shown in figure below.

This is a Spring security framework generated login page. Although the desired result is not what we intended (we donot want that the index page is accessed securily rather by all users and guests) but it is clear that Spring Security is up and running, integrated into our Spring MVC application. I will try to correct this in my future post.Also I will show how you how you can add a custom your application specific login page.
Now let us supply the user id and password (jimi/jimispassword) and see what happens. You will be redirected to the index.html page. So it also suggests that Spring Security remembers what you tried prior to signing in.
Thats all for today hopefully. If I find time between watching Indial Premier League and World Field Hockey Finals I will try to clarify a few concepts later in the day.
test
ReplyDelete